
See the Video version of this Review here..
First a big thank you to Microsoft for providing the Microsoft Sidewinder X6 Gaming Keyboard for this Review.
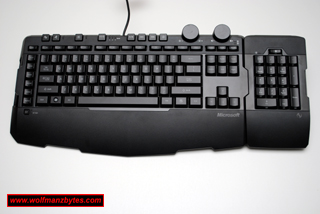
Today I get a chance to look at the Microsoft Sidewinder X6 Gaming keyboard and see what makes this keyboard a true gaming keyboard.
It’s been a while now since I looked at a gaming keyboard; the last gaming keyboard I looked at was the Microsoft Reclusa gaming keyboard. The first thing you notice when you unbox this keyboard is the look of it. This keyboard has a pretty cool look to it do to the way the buttons / dials are laid out across the top of the keyboard.
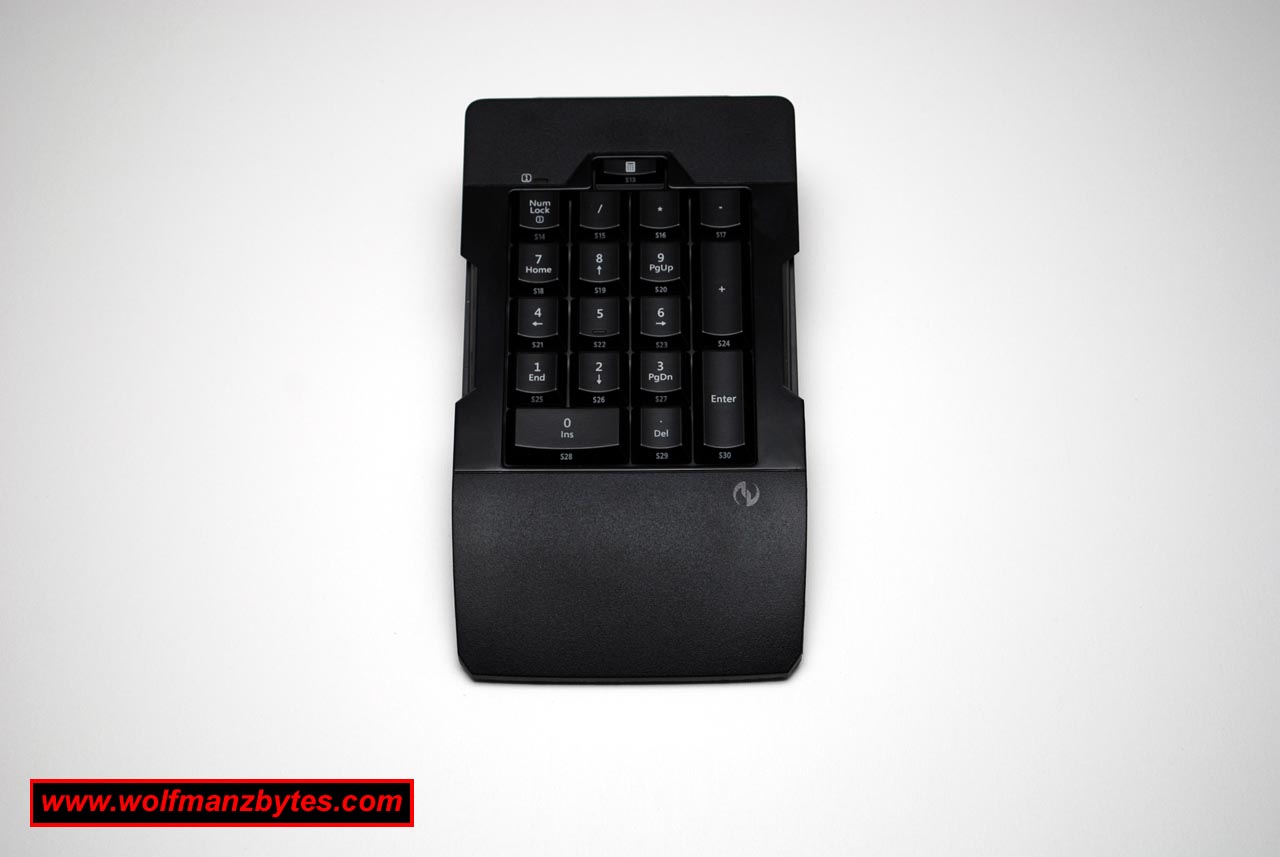
The other big thing you notice is that you can disconnect the number pad keys and move that to the left or right of the keyboard on the fly. The fact you can disconnect the number pad keys also comes in handy if you’re not going to use them at all and want to save on desk space. The picture below shows the keyboard without the number pad keys and how small the keyboard footprint is.
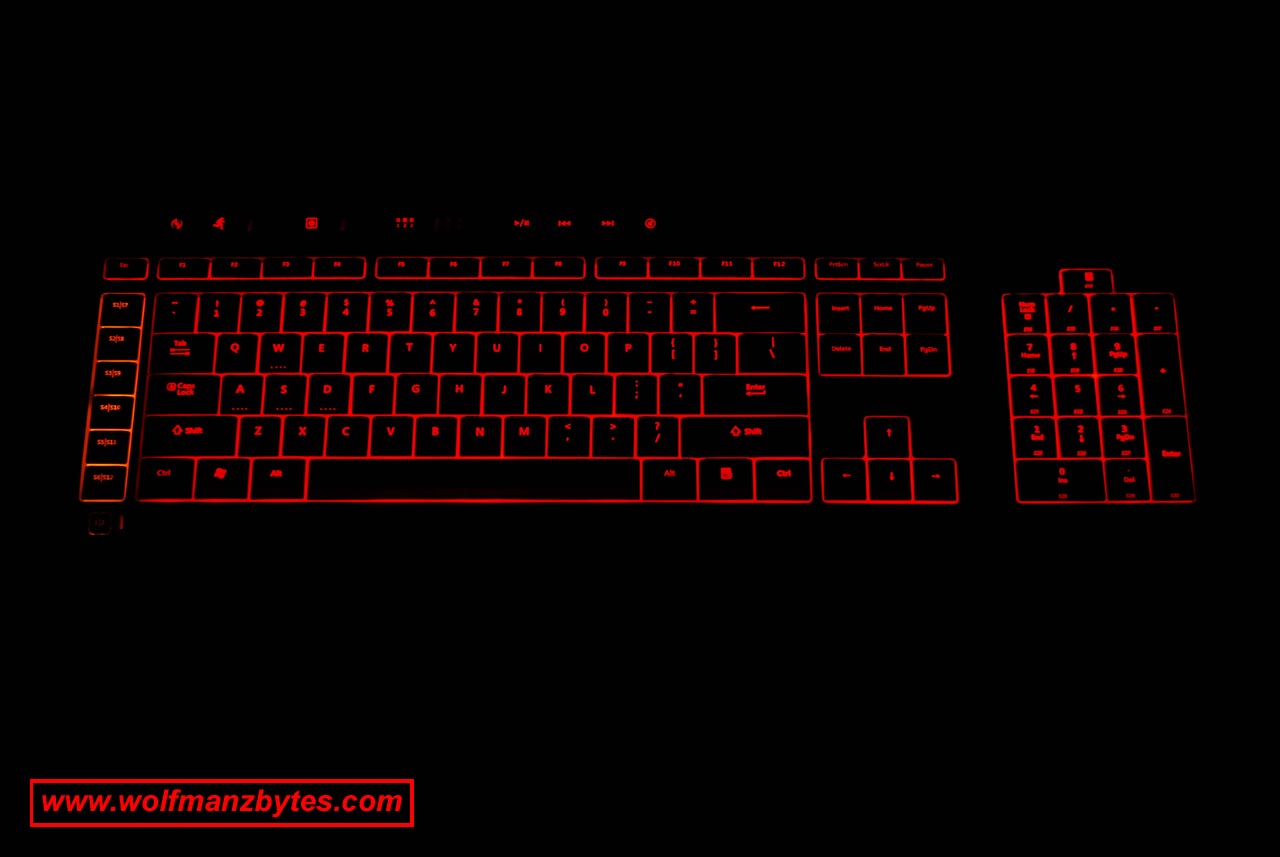
What I really liked about this keyboard is the lighting of the keys. As I mentioned above I have previously reviewed the Microsoft Reclusa keyboard and that had keys that were lit with a blue light. At the time that keyboard was impressive for how evenly lit the keys were. The new sidewinder X6 in my opinion blows away the Reclusa keyboard for lighting. The Sidewinder X6 uses a red lighting that makes the keys stand right out even in a well lit room. The main keyboard keys are red in color and the macro keys are an amber color and both look really good. The other big thing about this keyboard is the fact you have a dimmer dial beside the volume dial and with that you can control how bright or how dim you want the lighting on the keys. Below is a picture of the keyboard lit up with no other lights on in the room.
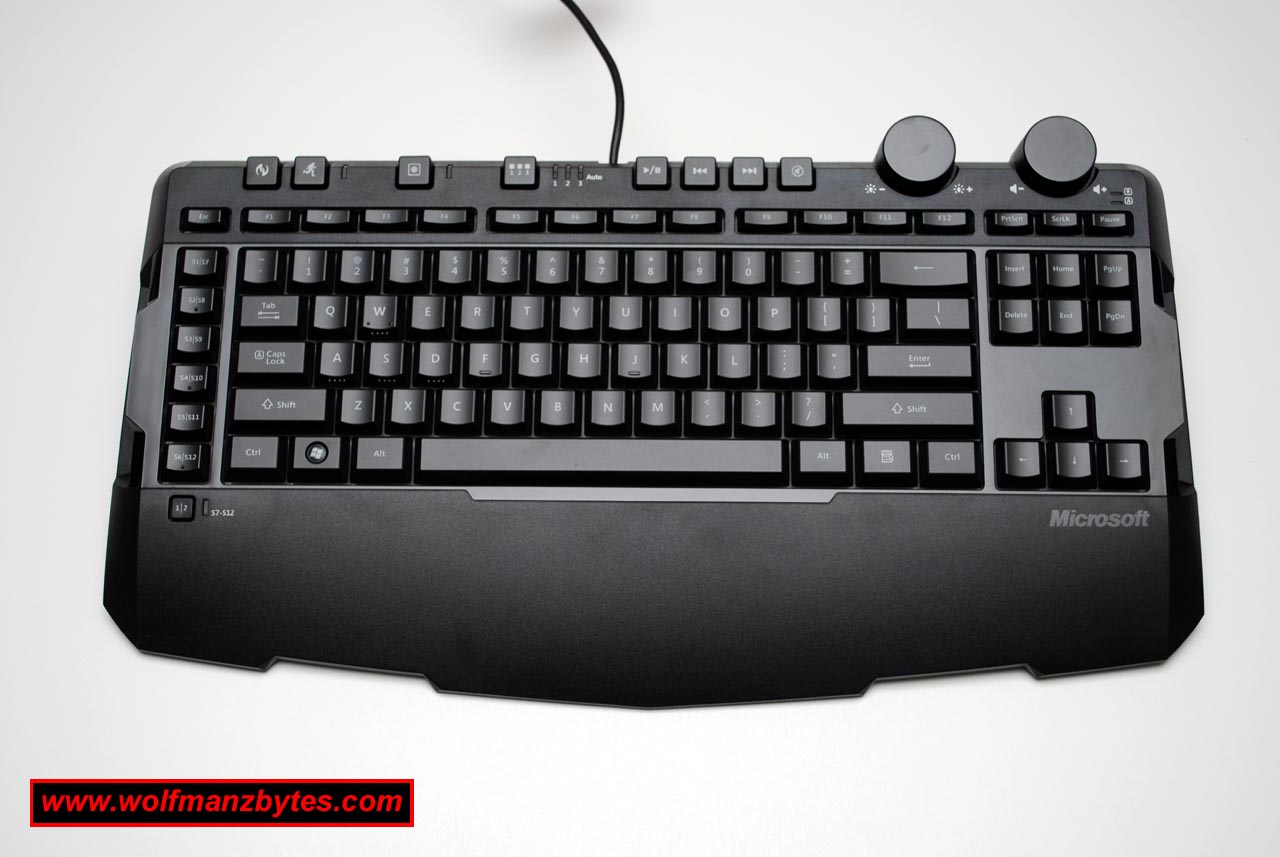
Looking at the top of the keyboard the first button you see that’s above the ESC key and to the right of it is the keyboard configure button. When you press this button down it will call up the keyboard properties and in there you can make macros for the macro keys and configure some of the buttons on the keyboard. Below is a picture of the keyboard properties along with another picture of the macro editor that you use to make macros.
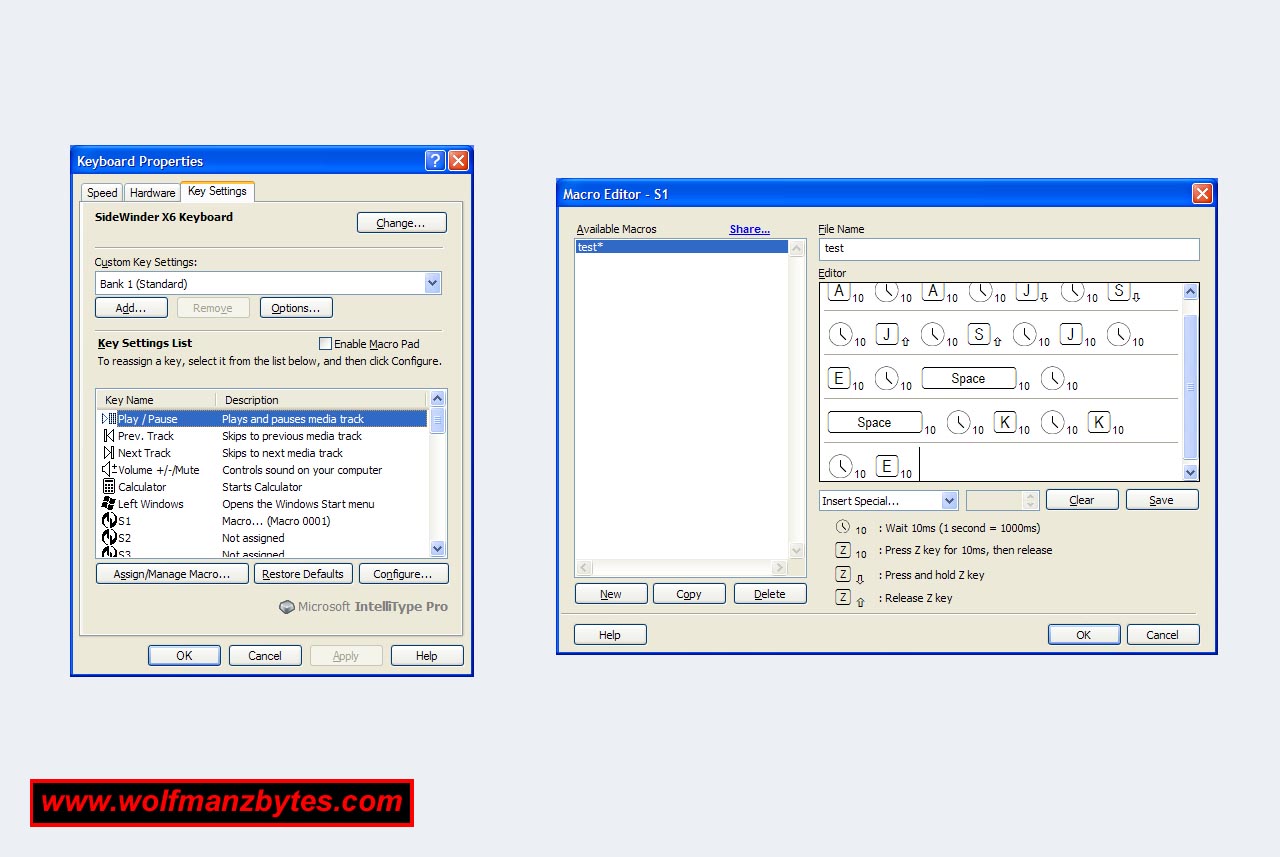
While on the topic of the macro editor, if you look at the screen shot above you will see this is the screen you will be using for making or adjusting any of your macros. The macro editor is very basic and will suit most of the gamers out there. However as I stated in the Microsoft Sidewinder X5 gaming mouse review the editor used for the keyboard macro’s is the same one used for the mouse software. The macro editor for the mouse suffered from not having any sort of keystate function where you could tell it to hold a key down for a set amount of time or leave the key left up for a certain amount of time. The keyboard macro editor also doesn’t do any sort of keystate either and that’s a shame.
The next button you see to the right of the keyboard properties button on top of the keyboard is the run button. Where this run function is handy is let’s say you’re in a game where you have to do a lot of walking or running around and you’re constantly holding a keyboard key down. With the run button you hold it down and then tap a keyboard key and then it will make it so that key is being pressed down all the time until you hit another keyboard key which resets the run key.
The next button you see to the right of the run button is the macro record button. To record a macro without using the keyboard properties software you just hit the record button and then hit one of the macro keys that are located on the keyboard. When you hit the macro key you will notice the record light starts to blink and that’s indicating that you’re recording a macro. Any keys you hit while the macro record option is enabled will be recorded to whatever macro button you assigned at the start. Where a feature like this is really handy is say you’re playing a game and you want to make a macro right then and there. With the macro record function you don’t need to fire up software to make the macro. If there are specific changes you want to do to the macro after you have made it you can then load up the macro editor in the keyboard properties and from within that adjust the macro.
The next button you see to the right of the macro record is the mode switching key. The mode key has 3 modes to it and basically it allows you to have different keyboard profiles for different games. Each time you hit this button the keyboard will use a different profile. This makes this keyboard pretty flexible in that you could have up to three different games setup for the macro keys.
The next set of buttons to the right of the mode button are for your multimedia options such as playing and pausing along with next and pervious track buttons. Right beside these buttons are the light dimmer knob and the volume knob.
Right under the ESC key you see a row of six buttons these are your macro buttons. Under the macro buttons you have a smaller button and when you hit that your first six buttons turn into another six buttons. In total you have twelve buttons that you can assign macros to.
Where stuff really gets interesting though is the number pad keys. If you go into the keyboard properties there is an option in there to turn the number pad keys into yet more macro keys. When you turn this option on you will notice the red lighting on the number pad keys changes to the amber colored lighting you see on the macro keys under the ESC key. With the number pad keys set to be macro keys you go from having twelve macro keys to having thirty.
This keyboard is also good for typing on as well, the keys are nice and springy and don’t make too much noise when your typing on it. Also do to the fact you can remove the number pad keys also means the keyboard is nice and compact and great for sitting on your lap and typing stuff up. The angle of the keyboard is also set so there are no little legs on the bottom of the keyboard you can pop out and change the angle of the keyboard for typing on.
The one real down side I can see to this keyboard is with the keyboard properties. I don’t understand why Microsoft would make it so you can program the macro keys and even the multimedia keys but yet they left out all the other keys on the keyboard including the F1 to F12 keys. How much harder would it have been to make it so that any key on the keyboard could be a macro key?
The other thing this keyboard is missing is an LCD display like what you see on the Logitech G15 keyboard. The LCD would make this keyboard a lot better in that you could have information piped to the LCD like who is entering and leaving your vent or teamspeak server. There are countless projects underway for the Logitech G15 keyboard and its LCD display, too bad Microsoft doesn’t have something to compete with that.
In conclusion this is a good keyboard for gaming and will no doubt please a lot of people. As mentioned above there are a few things I would like to see this keyboard have and hopefully Microsoft addresses these things in the future. At the time of this Review you could purchase the Microsoft Sidewinder X6 Gaming Keyboard for about $90.00 Canadian.
WolfManz611..
